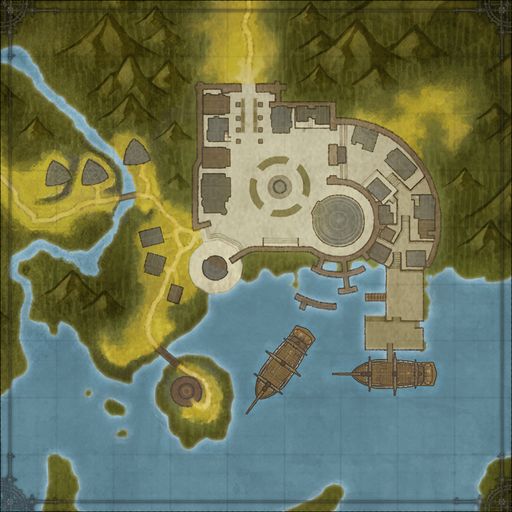
Bomb Retrieval

arrow Description

Adjunct Deil wants to analyze the bombs used by the Rengot Bombardiers. Make your way up the uphill road near the Supply Zone and bring back three Fused Goblin Bombs.


arrow Objectives:

  1. Collect Fused Goblin Bombs (Collect 3x Fused Goblin Bomb)
    Starts in Rengot Village
    zone map
    quest icon
arrow r Category Rengot Village
arrow r Quest Level 13


Share
HTML
BBCode

Rewards:

  • Money: 15s 77c
  • Experience: 3600

A Helping Hand

arrow Description

Speak to Senior Knight Senes and ask her to send you to Hunter Yohoma’s Domain. Once there, free the Trapped Soldiers and eliminate Hunter Yohoma to prevent him from setting any more traps.
You will need Senes’ Trap Tool in order to disarm the traps.


arrow Objectives:

  1. Speak to Senior Knight Senes and Enter Yohoma’s Domain
    Starts in Rengot Village
    zone map
    quest icon
  2. Disable the Traps (Interact with 6x Freed Soldier, Freed Soldier)
    Starts in Rengot Village
    zone map
    quest icon
  3. Eliminate Hunter Yohoma (Destroy 1x Hunter Yohoma)
    Starts in Rengot Village
    zone map
    quest icon
arrow r Category Rengot Village
arrow r Quest Level 13


Share
HTML
BBCode

Rewards:

Rescue Morten Gear

arrow Description

Tian asks you to eliminate Moken’s pirates who have been trying to invade Morten Gear. Quickly eliminate the Lizard Man Raiders that have appeared on the nearby beaches.


arrow Objectives:

  1. Eliminate Lizard Man Raiders (Destroy 6x Lizard Man Raider)
    Starts in Broken Mast
    zone map
    quest icon
arrow r Category Broken Mast
arrow r Quest Level 4


Share
HTML
BBCode

Rewards:

  • Money: 2s 57c
  • Experience: 1000

Weapon of the Legends

arrow Description

Blacksmith Loco is highly discouraged because there is no weapon that can defeat the Crawler. Archaeologist Kargas said that since the ancient people sealed the Crawler away once before, they must have left a way to destroy if it should ever escape. You should go to the Aborus Ruins as Archaeologist Kargas suggested.
Blacksmith Loco recommends that you borrow a Moa from Farm Owner Eshurika and ride it to the Aborus Ruins.
(Using the Dash skill while riding a Moa will allow you to move faster.)

arrow Objectives:

  1. Ride a Moa
    Starts in Broken Mast
    zone map
    quest icon
  2. Find the Aborus Ruins
    Starts in Broken Mast
    zone map
    quest icon
arrow r Category Broken Mast
arrow r Quest Level 4


Share
HTML
BBCode

Rewards:

  • Money: 2s 57c
  • Experience: 1000

Sealed Lightning Stones

arrow Description

Sorcerer Lushka discovered that the Sealed Lightning Stones used to power the stone golems in the ruins have attributes that counteract the Crawler’s power.
Defeat Ancient Kuotes Stone Statues and Moss-Covered Golems and collect their Sealed Lightning Stones.
(These enemies can be defeated more easily if you receive the power of the ancient spirits from the Stone of Consciousness or from the totems scattered around the ruins.)


arrow Objectives:

  1. Destroy Ancient Kuotes Stone Statues (Destroy 3x Ancient Kuotes Stone Statue)
    Starts in Broken Mast
    zone map
    quest icon
  2. Destroy Moss-Covered Golems (Destroy 4x Moss-Covered Golem)
    Starts in Broken Mast
    zone map
    quest icon
  3. Collect Sealed Lightning Stones (Collect 7x Sealed Lightning Stone)
    Starts in Broken Mast
    zone map
    quest icon
arrow r Category Broken Mast
arrow r Quest Level 4


Share
HTML
BBCode

Rewards:

  • Money: 6s 43c
  • Experience: 2500

Great Magical Power

arrow Description

Sorcerer Lushka says that the Sealed Lightning Stones are not powerful enough, and they must be amplified. In order to do this, you can use the powerful magic remaining in the ruins of Ancient Kuotes.
Activate the Magic Furnaces located throughout the Aborus Ruins. They resemble giant blue crystals.


arrow Objectives:

  1. Activate the first Magic Furnace (Interact with 1x Magic Furnace)
    Starts in Broken Mast
    zone map
    quest icon
  2. Activate the second Magic Furnace (Interact with 1x Magic Furnace)
    Starts in Broken Mast
    zone map
    quest icon
  3. Activate the third Magic Furnace (Interact with 1x Magic Furnace)
    Starts in Broken Mast
    zone map
    quest icon
  4. Activate the fourth Magic Furnace (Interact with 1x Magic Furnace)
    Starts in Broken Mast
    zone map
    quest icon
arrow r Category Broken Mast
arrow r Quest Level 5


Share
HTML
BBCode

Rewards:

  • Money: 7s 6c
  • Experience: 2500

Branch of Sealing

arrow Description

Sorcerer Lushka said that you will need the Branch of Sealing in order to focus the energy of the Sealed Lightning Stones. Unfortunately, the Ancient Kuotes High Priest is using the Branch of Sealing to preserve his undead body, and will not give it up easily.
Eliminate the Ancient Kuotes High Priest and retrieve the Branch of Sealing.
(The Ancient Kuotes High Priest can be defeated more easily if you receive the power of the ancient spirits from the Stone of Consciousness or from the totems scattered around the ruins.)


arrow Objectives:

  1. Eliminate the Ancient Kuotes High Priest (Destroy 1x Ancient Kuotes High Priest)
    Starts in Broken Mast
    zone map
    quest icon
  2. Acquire the Branch of Sealing (Collect 1x Branch of Sealing)
    Starts in Broken Mast
    zone map
    quest icon
arrow r Category Broken Mast
arrow r Quest Level 5


Share
HTML
BBCode

Rewards:

  • Money: 7s 6c
  • Experience: 2500

Deliver the Light

arrow Description

Sorcerer Lushka summons the remaining magical power in the Aborus Ruins and combines the amplified Sealed Lightning Stones and the Branch of Sealing into the Light of Kuotes. Bring this powerful artifact to Blacksmith Loco in Morten Gear in order to create a weapon that can defeat the Crawler.


arrow Objectives:

  1. Bring the Light of Kuotes to Blacksmith Loco
    Starts in Broken Mast
    zone map
    quest icon
arrow r Category Broken Mast
arrow r Quest Level 5


Share
HTML
BBCode

Rewards:

  • Money: 5s 65c
  • Experience: 2000

Desperate Defense

arrow Description

While the advance scouts were busy at Moken’s Base, Moken’s minions launched an attack on Morten Gear. The Crawler is on its way, and Tian is in great danger. Return to Morten Gear at once to help her fight off the attack.


arrow Objectives:

  1. Help Defend Morten Gear
    Starts in Broken Mast
    zone map
    quest icon
    Ends in Broken Mast
    zone map
    quest icon
  2. Protect Tian
    Starts in Broken Mast
    zone map
    quest icon
  3. Eliminate the Crawler
    Starts in Broken Mast
    zone map
    quest icon
    Ends in Broken Mast
    zone map
    quest icon
arrow r Category Broken Mast
arrow r Quest Level 7


Share
HTML
BBCode

Rewards:

Time to Strike Back

arrow Description

Silver wants to reduce the number of pirates guarding Moken’s Hideout before he enters it. Go to Moken’s Pirate Base and eliminate Moken’s Pirates.


arrow Objectives:

  1. Eliminate Moken’s Pirates (Destroy 9x Moken’s Pirate, Moken’s Pirate, Moken’s Pirate, Moken’s Pirate)
    Starts in Broken Mast
    zone map
    quest icon
arrow r Category Broken Mast
arrow r Quest Level 6


Share
HTML
BBCode

Rewards:

  • Money: 91c
  • Experience: 300